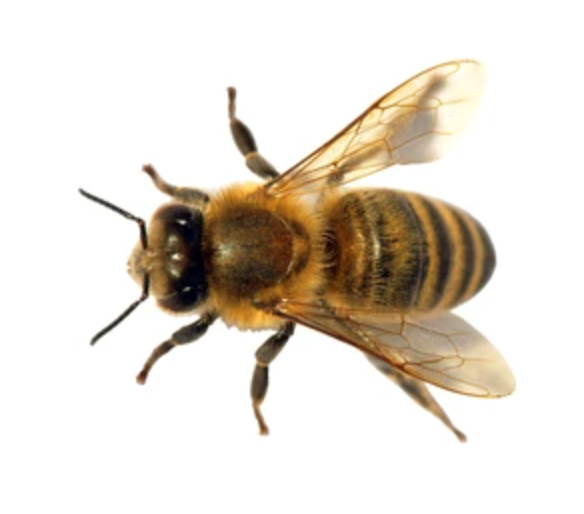
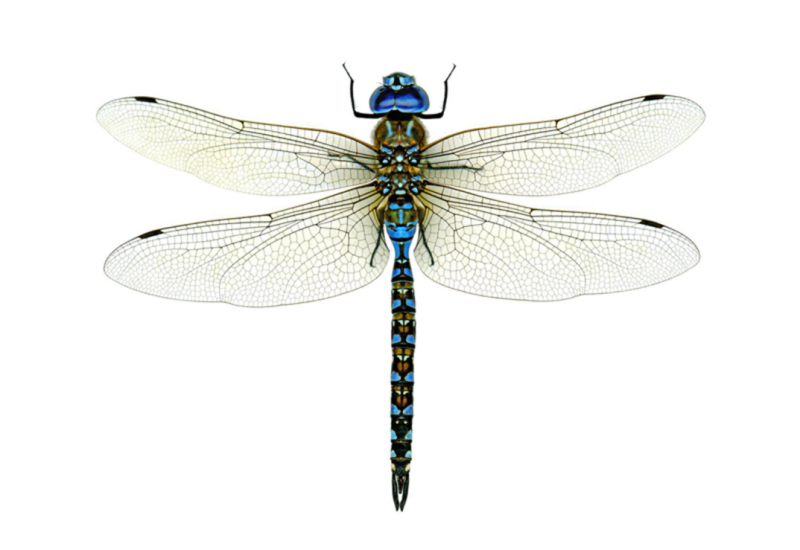
With summer around the corner, we are starting to see all sorts of critters emerge from their winter hideouts! For this project, get inspired by beneficial flyers such as the dragonfly, ladybug and honeybee. Closely examine these amazing creatures using the following questions: What do you notice about these insects? How are they the same or different? What shapes, colours and textures are present? How does their anatomical design meet their needs? Next, choose an insect from our list or one of your own and follow the instructions to turn your observations into a macro view mini sculpture.
This is an extended project to be worked on over several days (including drying time). Check out our video below for step-by-step visual instructions. Skip ahead and pause the video as needed.
Materials
For this project, you will need the following:
- 1 recipe paper clay *see resources section
- Craft wire
- Needle nose pliers
- Wire cutters
- Scissors
- 1-2 Skewers
- Acrylic paint
- Brushes
- Water
- Mixed papers, fabrics and foils (wrapping paper, old book pages, tissue paper etc.)
- White glue
- Popsicle stick or similar to apply glue
- Sharpie or markers
The Process
- Prep the paper clay in advance (see instructions below)
- Select an insect to explore (from our list or one of your own). Sketch your insect from the images here or head outside and see if you can find your chosen insect in situ. Observe the insect as it flies around, use our questions prompts and record your observations on a piece of paper or in a sketchbook.
- Create an armature of your bug using craft wire and a skewer (Like a skeleton, an armature supports the paper clay and gives it a structure). When using wire cutters, be sure to hold both sides of the wire to prevent little pieces from flying off or up towards your face. Safety glasses are recommended.
- Next, take a small amount of the paper clay and begin to shape it around your armature. Keep building up the layers until you have the shape and size you want.
- Set in a safe place and let dry. This can take upwards of 4 days to completely dry out.
- Once your sculpture is dry, it is time to finalize the details with wire, paint and mixed paper.
Resources
Paper clay recipe
- shredded paper or newspaper cut into pieces
- large bowl
- hot water
- flour – 1 part flour to 3-4 parts pulp
- salt (prevents from molding)
- a hand blender or mixer
To make paper clay:
- Shred paper. A paper shredder works best but you can also use scissors to cut paper into thin strips
- Place paper in a heat-safe bowl. Pour hot water over paper. Let sit for at least an hour up to overnight.
- Use a hand blender and blend paper with water until it becomes a pulpy soup.
- Take handfuls of the pulp and squeeze out water. Set squeezed pulp ball in to separate bowl. Repeat until you have squeezed out and separates most of the pulp from water. Tip: a fine strainer can help separate paper and water just ask permission before you use it and clean well immediately after use.
- Add flour to paper (1 part flour to 3-4 parts pulp). Add a tablespoon of salt. Mix well.
- Squeeze paper into a ball to ring out any excess water.
- Your paper clay is ready to be used! Store unused paper clay in an airtight container for up to two weeks.
Source
“How to Make Paper Clay - 8 Steps with Pictures - Red Ted Art.” Red Ted Art - Make Crafting with Kids Easy & Fun, 22 Oct. 2020, www.redtedart.com/how-to-make-paper-clay-8-steps-with-pictures/?cn-reloaded=1.
Terms
Sculpture: The art of making three-dimensional forms, abstract or representational by carving, casting, or other shaping techniques. Can be created using a variety of materials such as clay, stone wood, bronze and others.
Armature: an internal framework or structure used to support a sculpture